Showing posts with label Handicrafts. Show all posts

December 02, 2014

CD Lamp with LEDs

Versión del blog en Español aquí

Throughout my life, I've been accumulating an important quantity of CDs and DVDs. Nowadays, with hard drives and pen drives all over the place, I barely use the round plastic things anymore. That's way I decided to get rid of all of them that I could find. It turns out I had a bunch and felt like a waste of money just to throw them away, so I decided to make a last useful thing with them. A LED-CD Lamp.
I'm not the first one to come up with this idea. I had seen many lamps over the internet, but I didn't want to get influenced for other people's designs, so I just started mine from scratch. (Any resemblance [except for the CDs, obviously] with other lamps is pure coincidence).
Again, my mistake is to get too excited with the project I'm working on, and I forget to make an exhaustive documentation of all the steps I took, but I'll do my best to explain things clearly with the few pictures I took.
I removed the old curtains of my apartment, and with them, the rods where they were hanging. Again, instead of just throwing them away, I decided to make something new with them, so I cut them in pieces of 50cm to give rigidity to the lamp structure.
Taking the dimensions of the rod into consideration, I designed the bottom and the top for my lamp.
Bottom part of the lamp
Top part of the lamp
The rod parts will go in the small holes surrounding the big hole for the CDs.
I did buy the RGB LED stripe, and cut two pieces of 50cm (the height of the lamp).
I say I cut two pieces because the whole stripe has a limitation in the angle it can bend without compromising the components, and I needed a 180º fold at the top of the lamp to be able to stick the two pieces of the stripe "back to back". I then soldered a small wire in every connection of one end of every stripe.
And now only was left to solder the cables of the same connection with each other. The +12V of one stripe with the +12V of the other stripe, blue with blue, red with red, and green with green. In the picture from above, I soldered a colored wire corresponding to the color of the connection, so it was just a matter of soldering the same colors together.
And finally, the set up was pretty easy:
  1. Place the bottom printed part on the table.
  2. Insert the rod pieces in the holes surrounding the CDs.
  3. Put the CDs in the center of the bottom part.
  4. Fit the two stripes through the CDs.
  5. Close the structure with the top printed part.
And this is the result:
And a short video:


June 02, 2013

LED lamp medieval style

Versión del blog en Español aquí

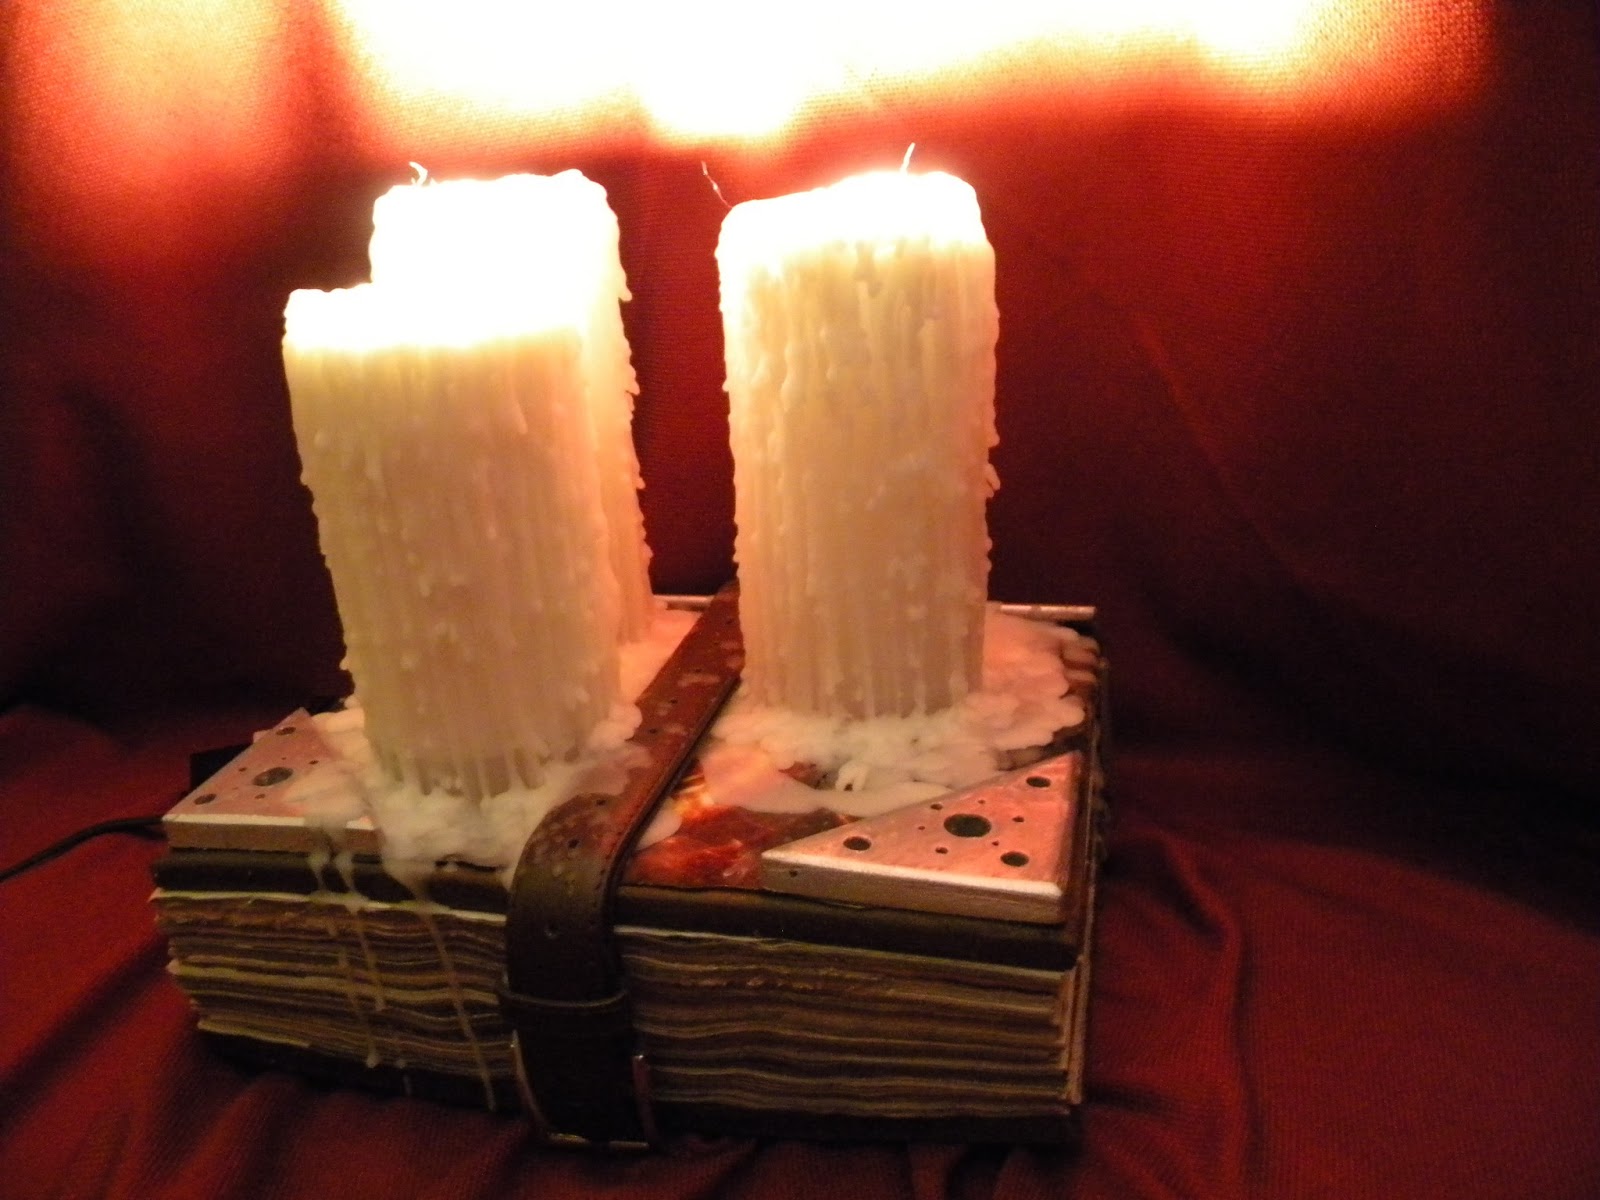
I always loved the medieval stuff and when I was playing Diablo III (unfortunately I don't have time anymore) I saw a video where one of the scenes happened in a library. There were many old books piled in stacks with big melted candles on top of them, and I really loved how medieval-looking image that was (or at least, that's what I thought). Since one of my many hobbies is to build things that I like, no matter how difficult or unrealistic the project is, I went for it, having in mind the idea from the video. As to be expected, using real candles can be dangerous and since I didn't feel like setting anything on fire, I chose to use LEDs.

I went to a lamp store and bought and LED lamp that came in parts. On the one hand you had the luminosity regulator and the tension converter, and on the other hand you had the LED lights. I was going to need three of them for my experiment, but I could have used up to six of them.

In a store that sells stuff for hobbies, I bought a round candle mold and lots of bee wax. You can also find paraffin wax, but I like the smell and the touch of the first one better.

And in a hardware store, I bought an aluminium pipe, of around two centimeters in diameter, and some paint in spray.

I would have liked to have pictures of all the process, but when I decided I was going to make the lamp, I didn't know I was going to end up writing a blog like this one, so I apologize in advance if the explanation seems a little poor, even though I will try to give all the details I can remember. But of course, don't hesitate to ask as many questions as you like.

Making the candles:
The candles had to be hollow in the middle so the wire of the lamp could go through them. I cut the pipe  in three different sizes that I wanted for the three candles. Then, I put every piece inside the mold, in the middle, so when I pour the wax the core would stay hollow.

You have to be specially careful while melting wax. That's why I strongly recommend to read the instructions before doing it and follow the steps thoroughly because handling the wax in an improper manner can cause very dangerous results.

Making the book:
For the cover, I used some scraps of wood I had at home and painted them with the sprays. For the pages of the book I used old newspapers that I cut with a guillotine and then glued together so they didn't move. I  glued a burnt photo to give it an old, used look and smaller pieces of wood painted with silver paint. I then made three holes where the candles would go so the cables of the LEDs could be put through.

Putting everything together:
When the wax cools down, it shrinks, so even when you filled the mold all the length of the central pipe, you'll see that a couple of centimeters of the pipe protrude. This is good, because it will be the end that will fit in the holes of the book and will give the candles more stability.

We fit the candles in the holes of the book and put the cables of the LEDs through them. Since the cases of the lights were in sight, one way to cover them was to melt wax over them. This makes it look that the candles have been used and the melting wax spilled over.

The last step was to tie a belt around the book and connect the LED's to the converter.

This was the final result: